結論
$ sudo apt install -y libjpeg-dev libonig-dev libzip-dev libcurl4-openssl-dev re2c libxml2-dev libtidy-dev libxslt-dev libmcrypt-dev libreadline-dev autoconf
$ sudo apt install -y libjpeg-dev libonig-dev libzip-dev libcurl4-openssl-dev re2c libxml2-dev libtidy-dev libxslt-dev libmcrypt-dev libreadline-dev autoconf
設定ファイルの profiles 配下の defaults または list 配下の内容に "useAcrylic": true と "acrylicOpacity": 0.7 を追加する。
例えば、Ubuntu 20.04 のウィンドウに対して、透過度を 0.5 とするように設定します。そのときの設定ファイルの内容は次のとおりです。
// This file was initially generated by Windows Terminal 1.4.3243.0
// It should still be usable in newer versions, but newer versions might have additional
// settings, help text, or changes that you will not see unless you clear this file
// and let us generate a new one for you.

(中略)

{
    (中略)

    // A profile specifies a command to execute paired with information about how it should look and feel.
    // Each one of them will appear in the 'New Tab' dropdown,
    //   and can be invoked from the commandline with `wt.exe -p xxx`
    // To learn more about profiles, visit https://aka.ms/terminal-profile-settings
    "profiles":
    {
        "defaults":
        {
        },
        "list":
        [
            {
                (中略)

                "useAcrylic": true,
                "acrylicOpacity": 0.5

                (中略)
            },
    (後略)
全ての list 内の環境に対しても適用したい場合は、list 内の要素に対してではなく、defaults の方に書きます。
公式ドキュメントに詳しく書いてあります*1。
*1:というか、ここに全て書いてあります
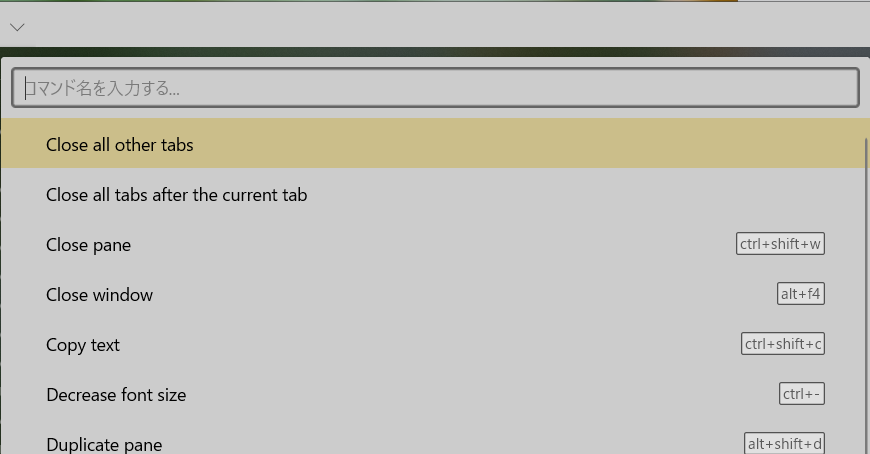
設定ファイル*1の、actions というディレクティブ内*2に、起動するためのキー割り当てを記載します。
例えば、ctrl+shift+p で起動する場合には、設定ファイル以下のように書きます(追記します)。
// This file was initially generated by Windows Terminal 1.4.3243.0
// It should still be usable in newer versions, but newer versions might have additional
// settings, help text, or changes that you will not see unless you clear this file
// and let us generate a new one for you.

(中略)

    // Add custom actions and keybindings to this array.
    // To unbind a key combination from your defaults.json, set the command to "unbound".
    // To learn more about actions and keybindings, visit https://aka.ms/terminal-keybindings
    "actions":
    [
        (中略)

        { "command": "commandPalette", "keys": "ctrl+shift+p" }
    ]
}
公式ドキュメント や一部の解説記事を見ても、「{ "command": "commandPalette", "keys": "ctrl+shift+p" } という内容を設定ファイルに追加しろ」と書いてあるだけなので混乱しました。
以下のとおりです。
[1] pry(main)> foo_bar = 'hoge'
=> "hoge"
[2] pry(main)> foo-bar = 'hoge'
NameError: undefined local variable or method `foo' for main:Object
from (pry):2:in `__pry__'